How to Post on WordPress
 WordPress is one of the most popular Content Management Systems (CMS) on the internet. It has an intuitive and user-friendly interface that allows users to build websites, blogs, or online stores without needing advanced coding skills. Although it has many complex features, you can still create great-looking blogs with minimal skills. This guide will walk you through the basic steps and tools involved in creating and publishing a blog post on WordPress.
1. Add a Title
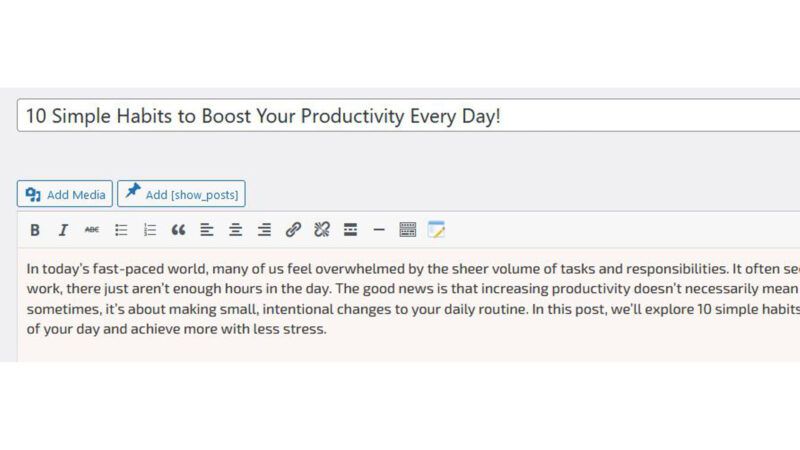 In the ‘Add Title’ box at the top of the page, post the name of your blog post. This title will appear at the top of your article and in search engine results. So, it’s important to include relevant keywords that indicate what your post is about.
2. Main Text Box
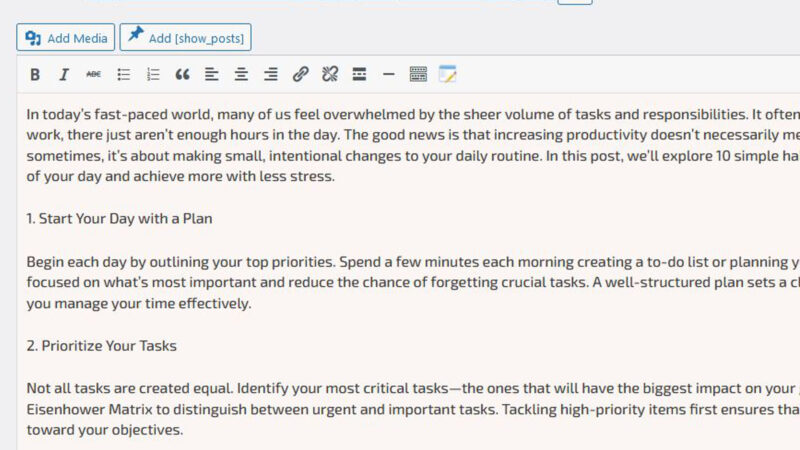 Below the Title Box, you will find a large content area in which to write or paste your blog content. Try to write the post with at least 500 words but preferably 1000 to 2000 words, and include some internal and external hyperlinks.
3. Formatting Your Text
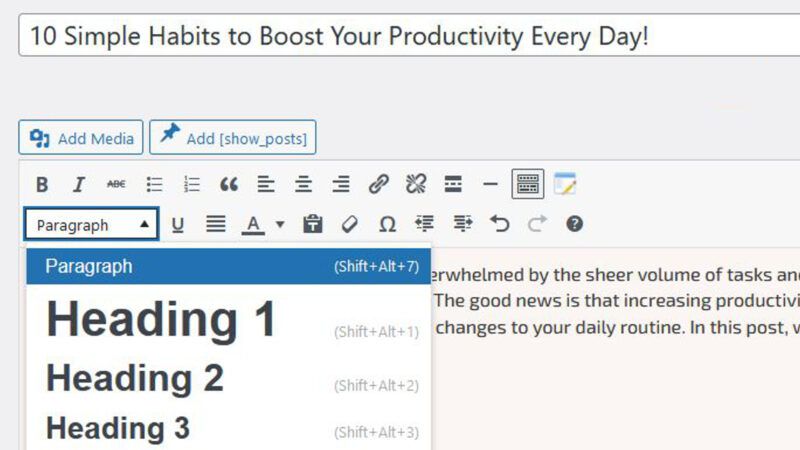 In the block editor above the text box, you have access to a range of text formatting tools that help you create well-structured and visually appealing content. The formatting toolbar offers options for adjusting text style, such as making it bold, italicised, or underlined, and for creating headings, lists, and quotes. You can also align text, adjust font sizes, and add links to other pages or external sites.
By using these tools, you can emphasise key points, organise information into easy-to-read sections, and enhance the overall readability of your post.
4. Adding Media
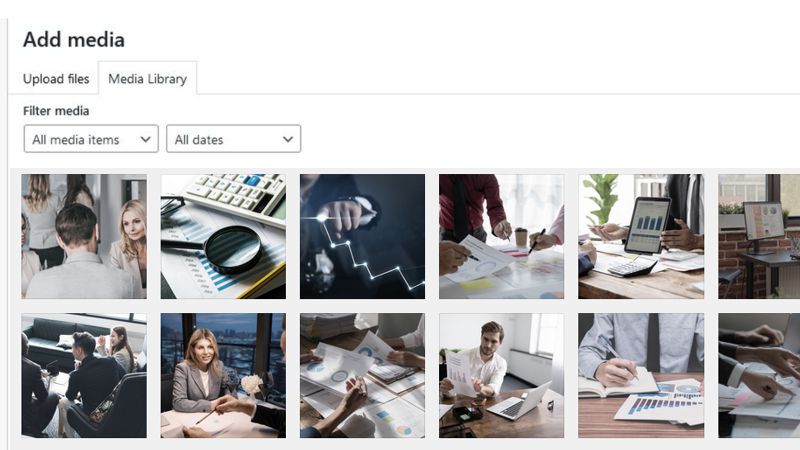 Above the block editor, you will find the ‘Add Media’ button. From here, you can upload, manage, and insert images, videos, and other files into your post.
For mobile-friendly layouts, it’s essential to avoid wrapping text around images, as this can lead to inconsistent formatting on smaller screens. Stack your images (centred) and text vertically so that images and text maintain proper spacing and alignment, offering a cleaner and more responsive design across all devices, especially mobile.
5. Excerpt
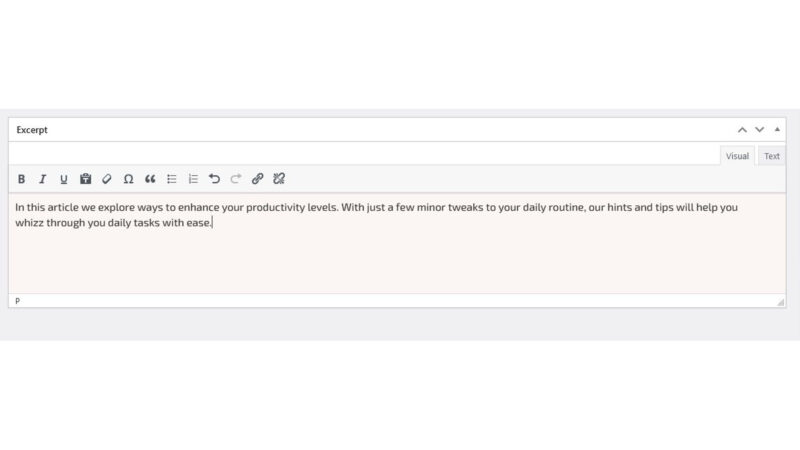 The Excerpt box in WordPress is a field where you can manually enter a summary or brief description of your post. This excerpt is often displayed in archive pages, search results, and blog listings, giving readers a preview of the content without showing the full post.

It allows you to control how your posts are presented in summary views and can be customised to capture attention. If you don’t add an excerpt, WordPress may automatically generate one from the first part of your post, but a manual excerpt ensures a more polished and engaging preview.
6. Publish Box
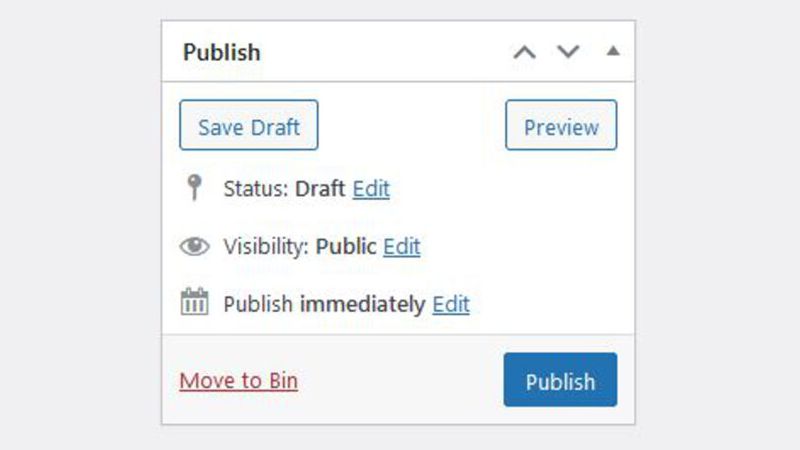 Once you’re satisfied with your post, it’s time to publish it. The Publish box in WordPress has options for managing the status, visibility, and timing of your posts. It allows you to change the post’s status from “Draft” to “Published” or “Pending Review.” You can also set the visibility to “Public,” “Private,” or “Password Protected,” depending on who you want to access the content.
Additionally, the Publish box includes a scheduling option, where you can set a specific date and time for the post to go live, which is ideal for planning or aligning content with campaigns. Once everything is set, simply click “Publish” to make the post live or scheduled as needed.
In the same box, you will find the ‘Preview’ button. It allows you to view your post and how it will look when published.
7. Categories
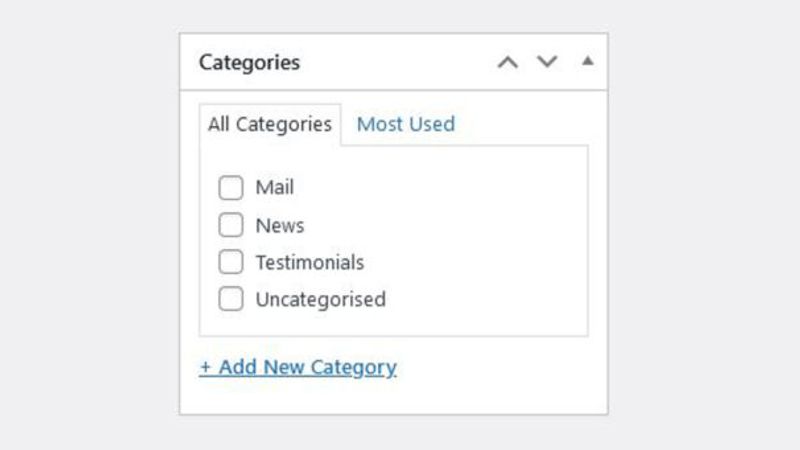 Categories in WordPress are used to group your posts into broad topics or sections, helping organise your content for both readers and SEO purposes. When creating or editing a post, you can assign it to one or more categories from the Categories box. Preview Your Post: Before publishing, use the “Preview” button to see how your post will look on your website. It allows you to make any necessary adjustments to ensure that everything looks perfect.
8. Featured Image
The featured image in WordPress is a visual representation of your post or page and often appears in post listings, archives, and social media previews. To set a featured image, use the Featured Image box in the editor to upload or select an image from the Media Library. This image helps attract readers’ attention and gives a quick visual summary of your content.
Conclusion
Posting a blog on WordPress involves more than just writing content. By effectively using WordPress’s key features—such as the block editor, categories and tags, featured images, and SEO tools—you can create well-organised, engaging, and optimised blog posts that resonate with your audience and perform well in search engines. With practice and attention to detail, you’ll be able to leverage WordPress to its full potential and make the most of your blogging efforts.
Further Reading
6 Reasons Why WordPress Is Still the Best Website Builder
The Anatomy of a Perfect Blog Post
Need help turning this advice into action?
If you are reviewing your website, marketing or online visibility, we can help you work out what to improve first.
Related articles
 Content
Traffic Magnets That Keep Visitors Coming Back
Getting people to visit your website is one challenge. Giving them a reason to stay, discover your business and come back is another. We…
Read article
Content
Traffic Magnets That Keep Visitors Coming Back
Getting people to visit your website is one challenge. Giving them a reason to stay, discover your business and come back is another. We…
Read article
 Content
How to Explain Complicated Services Simply
If it takes ten minutes to explain what your business does, you may have already lost the customer. Just because you know your profession…
Read article
Content
How to Explain Complicated Services Simply
If it takes ten minutes to explain what your business does, you may have already lost the customer. Just because you know your profession…
Read article
 SEO
Why Sounding Human Again May Be the Future of SEO
Why sounding human again may be the future of SEO. Discover why authentic content, Geo Marketing, and real expertise matter more than ever in…
Read article
SEO
Why Sounding Human Again May Be the Future of SEO
Why sounding human again may be the future of SEO. Discover why authentic content, Geo Marketing, and real expertise matter more than ever in…
Read article
 VideoandWeb.com